Integrating Polar subscriptions in your Django SaaS
Polar is a relatively new merchant of record platform for accepting payments online.
Acting as a layer on top of Stripe, it's an intuitive and easy to use product that also provides a set of APIs and SDKs to enable software developers to integrate payments into their products without much headache. Django is a stable and robust web framework for Python developers.
In this article, we'll take a look at how to integrate subscription-based payments using Polar in Django applications.
Set up Polar
We'll kick things off by first setting up the Polar side of things, starting with creating a "product".
Create a Polar product
In Polar, irrespective of whether you're selling a one-time purchase or a recurring subscription, everything is a "Product". Accordingly, let's set up a product on Polar.
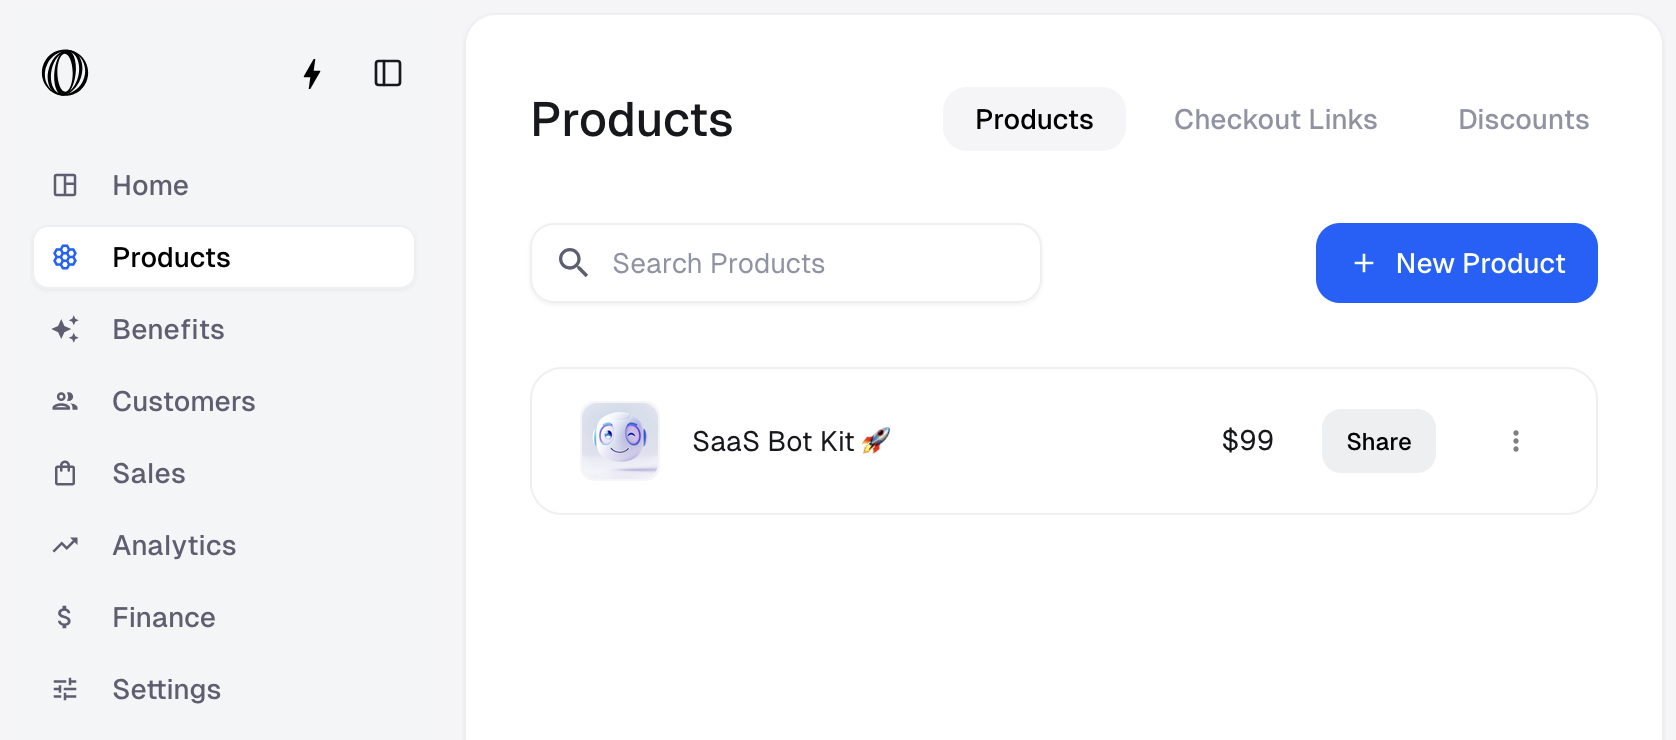
Select the "Products" tab from the navigation bar on the left and click on the "New Product" button. Add a product name and description, and pick a pricing model along with a billing cycle of your preference. When setting up subscriptions, both "Monthly" and "Yearly" are valid options to use.
You may also want to check out Polar's own guide on creating products: https://docs.polar.sh/features/products.
Set up Polar webhooks
The next step is to have Polar notify your Django app whenever something happens on Polar's end. For instance, if a customer signs up for a subscription (or cancels an existing one), this is something your Django app should know about so it can "unlock" paid features for that customer. We'll set up webhooks to enable this workflow.
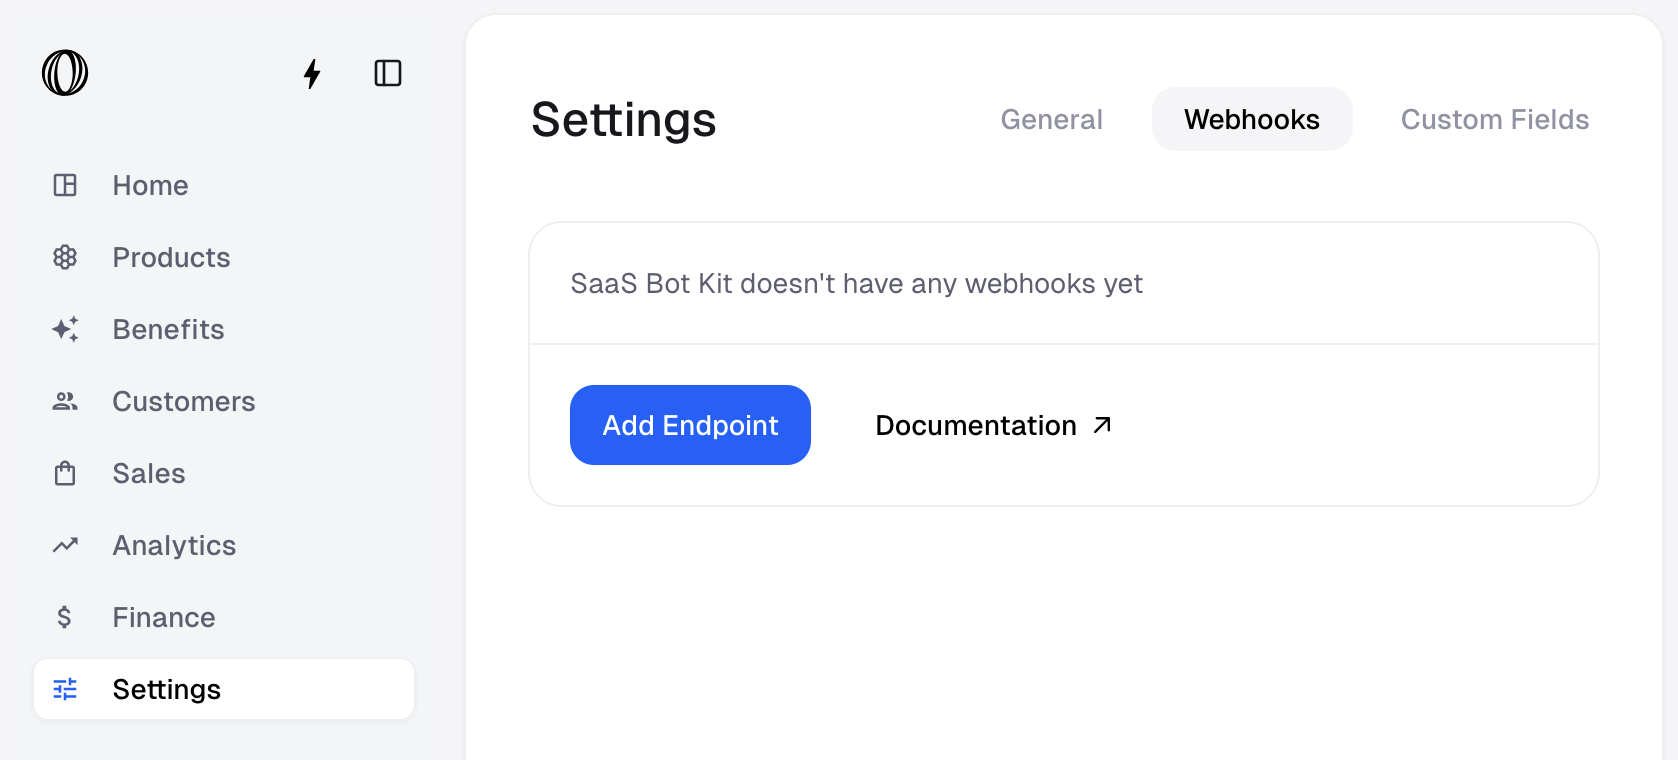
Click on the "Settings" tab in the navigation bar on the left and then select the "Webhooks" section. Click on "Add Endpoint" to add a new webhook.
In the URL field, enter the publicly available URL on which your Django app is
available. In the "Format" field, select "Raw", which would instruct Polar to send the
raw JSON data of the event to your Django app. In the "Secret" field, click on
"Generate" to have Polar automatically generate a secure secret for you. Make sure that
you copy this value somewhere as we'll need to put it in Django later! And finally, in
the "Events" field, select which events are interesting for your Django app. For a basic
integration, the subscription.active and subscription.revoked events should be
enough. The first event tells us when a customer activated a subscription and the second
one tells us when they canceled.
You may also want to check out Polar's own guide on setting up webhooks: https://docs.polar.sh/integrate/webhooks/endpoints.
Set up Django
Now that the Polar setup is out of the way, let's move on to the Django part of the puzzle.
There are, of course, multiple ways of integrating recurring subscriptions in Django – in this blog post we'll explore one of those many different ways.
Polar provides a nice Python SDK to work with its API, which can be installed by adding
the polar-sdk package to your requirements. If you're using uv, this means running
uv add polar-sdk in your project.
The overall workflow we're going for involves storing a few details of the subscription in our database, and having the Django app listen to webhooks to sync the subscription details in response to any action that the customer takes on Polar.
Create Django model
Let's start with defining the data model first.
What we'd like to store is Polar's subscription API object. One way to do that is to
define a Subscription model, link it to Django's User model along with some required
metadata. Here's a first pass:
from django.db import models
from django.contrib.auth import get_user_model

User = get_user_model()

class Subscription(models.Model):
    class Status(models.TextChoices):
        active = "active"
        canceled = "canceled"
        unpaid = "unpaid"
        paused = "paused"
        trialing = "trialing"

    user = models.OneToOneField(
        User,
        on_delete=models.CASCADE,
        related_name="subscription",
    )
    polar_id = models.CharField(max_length=255, blank=True)
    polar_price_id = models.CharField(max_length=255)
    polar_customer_id = models.CharField(max_length=255, blank=True)
    status = models.CharField(max_length=32, choices=Status)
The Subscription model defined above has a one-to-one link with Django's User model,
such that user.subscription gives you the user's current subscription (if one exists).
It also contains the polar_id, polar_price_id, and polar_customer_id fields,
which are all values from Polar that we'd like to store in our Django database for quick
access. Lastly, the status field stores the current status of the subscription (eg.
whether the subscription is active or canceled or is in some other state).
Initiate Polar checkout from Django
The next step is to have your customer sign up for a subscription. When exactly this happens depends on the app you're building and the various touchpoints your customers may have. For instance, you may want to prompt them to sign up for a subscription from a "settings" page that your app implements, in which case you would want to initiate the checkout from the HTTP view that handles settings updates.
In any case, the important thing is to initiate a Polar checkout.
Luckily, there's a convenience method in Polar's Python SDK called
polar.checkouts.create that does exactly what its box says.
polar =  Polar(access_token=settings.POLAR_ACCESS_TOKEN)

polar.checkouts.create(
    request={
        "product_price_id": settings.POLAR_PRICE_ID,
        "success_url": "https://example.com",
        "customer_metadata": {"user_id": user.id},
    }
)
The code snippet above instantiates a Polar API client object and then defines a method
that accepts a User object as a parameter, and uses polar.checkouts.create to
create a checkout session for them. The parameters to polar.checkouts.create include
the price ID of your product on Polar, the success URL (where you want customers to end
up back at once they finish the checkout flow), and customer_metadata, which in this
case we use to store the internal Django ID of the user for easy lookups later.
Whenever you app runs this piece of code, the customer will be taken to Polar where they
can fill up their payment details and activate a subscription. After that happens, Polar
would send them back to the URL you passed in success_url (which in this example could
be the settings page where they initiated the checkout).
Handle webhooks
The next part is to handle webhooks that Polar sends to Django.
As mentioned earlier, the two events we need to handle for a basic integration include
subscription.active and subscription.revoked.
The subscription.active webhook is triggered when a subscription becomes active. In
terms of our Django app, this means that we should create a Subscription object for
the customer (if one does not exist already) and set its status to active.
Similarly, subscription.revoked is triggered when either a subscription is canceled or
payment is past due, resulting in the customer losing access to the application's paid
features.
This is where our Subscription model comes in handy. In our webhook API view, we need
to parse the JSON request body (since we set the webhook format to "raw" in an earlier
step), extract the customer's Django user ID (which we earlier set as metadata on the
customer object while creating the checkout), and update the associated subscription.
To handle subscription.active, we can create a Subscription object for the
current user and set its status to "active". Similarly, to handle
subscription.revoked, we can change the status of user.subscription to canceled.
Here's some sample code that shows this in action:
def handle_subscription_active(request):
    data = json.loads(request.body.decode())["data"]

    user = get_object_or_404(
        User, id=data["customer"]["metadata"]["user_id"]
    )

    Subscription.objects.create(
        slack_team=team,
        polar_id=data["id"],
        polar_price_id=data["price"]["id"],
        polar_customer_id=data["customer"]["id"],
        status=data["status"],
    )

def handle_subscription_revoked(request):
    data = json.loads(request.body.decode())["data"]

    subscription = get_object_or_404(Subscription, polar_id=data["id"])
    subscription.status = data["status"]
    subscription.save()
Allow customer portal access
The final piece in the puzzle is allowing customers to manage their subscriptions on their own.
Payment providers generally provide something called a "customer portal" which is an external site (hosted by the payment provider) where customers can go and do things like update their credit card details, generate invoices, or even cancel their subscriptions. Polar provides this too. All you need is a customer ID:
polar = Polar(access_token=settings.POLAR_ACCESS_TOKEN)

polar.customer_sessions.create(request={"customer_id": customer_id})
Again, the question of where this code should be run depends on your application.
One possibility is to show it in your "settings" page, if you have one. You could check
whether the customer has a valid user.subscription object, and if they do, give them
a "Manage Subscription" button that generates a customer session URL for them and
redirects them to it.
Profit!
And that's more or less it! In the previous sections we explored how to set up subscription based payments backed by Polar in Django applications.
We started with setting up Polar, adding a product and setting up webhooks. We then looked at the code changes required in the context of Django applications, looking at an example Django model definition, implementing the webhook handling, and enabling customer portal access.